This article will guide you through using and resolving common issues with the AV in the room that you are in.
If you are still unable to resolve your issue, please contact the Service Desk to report faults or request support:
- Phone extension 7777 or +44 (0)23 9284 7777
- Email servicedesk@port.ac.uk
- Log and track your own calls online at https://servicedesk.port.ac.uk
Common Issues:
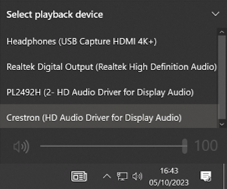
I am playing a video but there is no sound?
- Click on the speaker symbol in the task bar
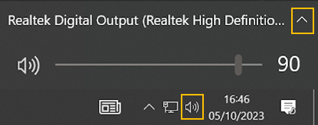
- Click on the up arrow to display the available playback devices
- Select Crestron (HD Audio Driver for Display Audio) by clicking on it
The projector and screen are on, but the contents of the laptop or PC screen I am using is not being displayed.
This could be due to the fact that your Multiple display settings on your laptop or PC are set as Extended, they need to be set as Duplicate
- On the keyboard press the Windows and P keys together
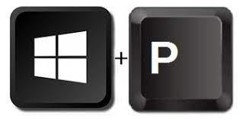
- A panel will display on the right of screen, select Duplicate by clicking on it
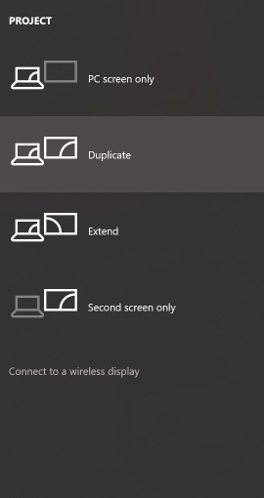
- Click away from the panel to close it
Where do I plug my laptop in?
- There is a plug on the side of the raised console that is convenient for plugging in a laptop
Using the AV Equipment
These instructions reference the following diagrams
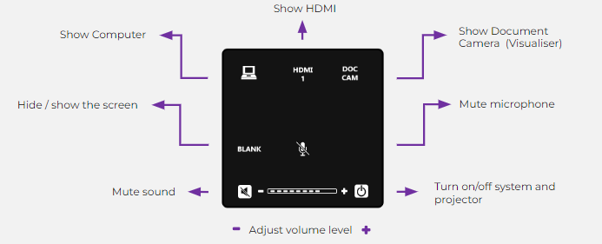
Crestron Control Panel
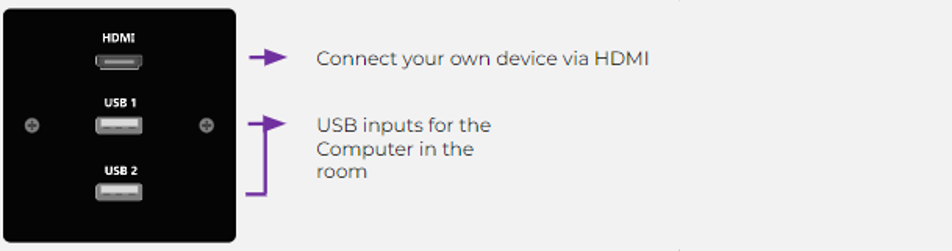
Crestron Input Panel
Using the PC to present
- Log into the PC with your University credentials
- On the Crestron Control panel press the on/off button to turn the AV system on
- On the Crestron Control panel select the PC Icon, it will turn blue to indicate it is selected
- The contents of the PC will be projected on the screen
Using a laptop to present
- Using the HDMI cable provided plug your laptop into the Input panel
- On the Crestron Control panel press the on/off button to turn the AV system on
- On the Crestron Control panel press the HDMI button, it will turn blue to indicate it is selected
- The contents of the laptop will be projected on the screen
Using the document visualiser
- On the Crestron Control Panel press on the Doc Camera button
- The Document Visualiser will light up
- Lift the arm of the Visualiser and place your document under the light, if the light does not come on then there should be a power button on the top of the raised arm which you will need to press
Using the microphone
- Speaking into the microphone will magnify your voice, to mute this click on microphone icon on the Crestron Control panel, press again to unmute
Stop projecting the screen or visualiser
-
To stop projecting onto the screen press on the Blank button on the Crestron Control Panel, the screen will become blank. Press the button again to continue projecting
Controlling the sound of a video
- Play the video on the PC or laptop
- Use the Volume control on the Crestron Control panel to adjust the volume